How I Used Meshy and Blender to Upgrade Traffic Rider Extreme Vehicles
This started as a small garage problem. I had three cars with different stats, but they looked like cousins wearing different paint. Here is how I turned that awkward first pass into three proper racing vehicles without making the browser game heavier.
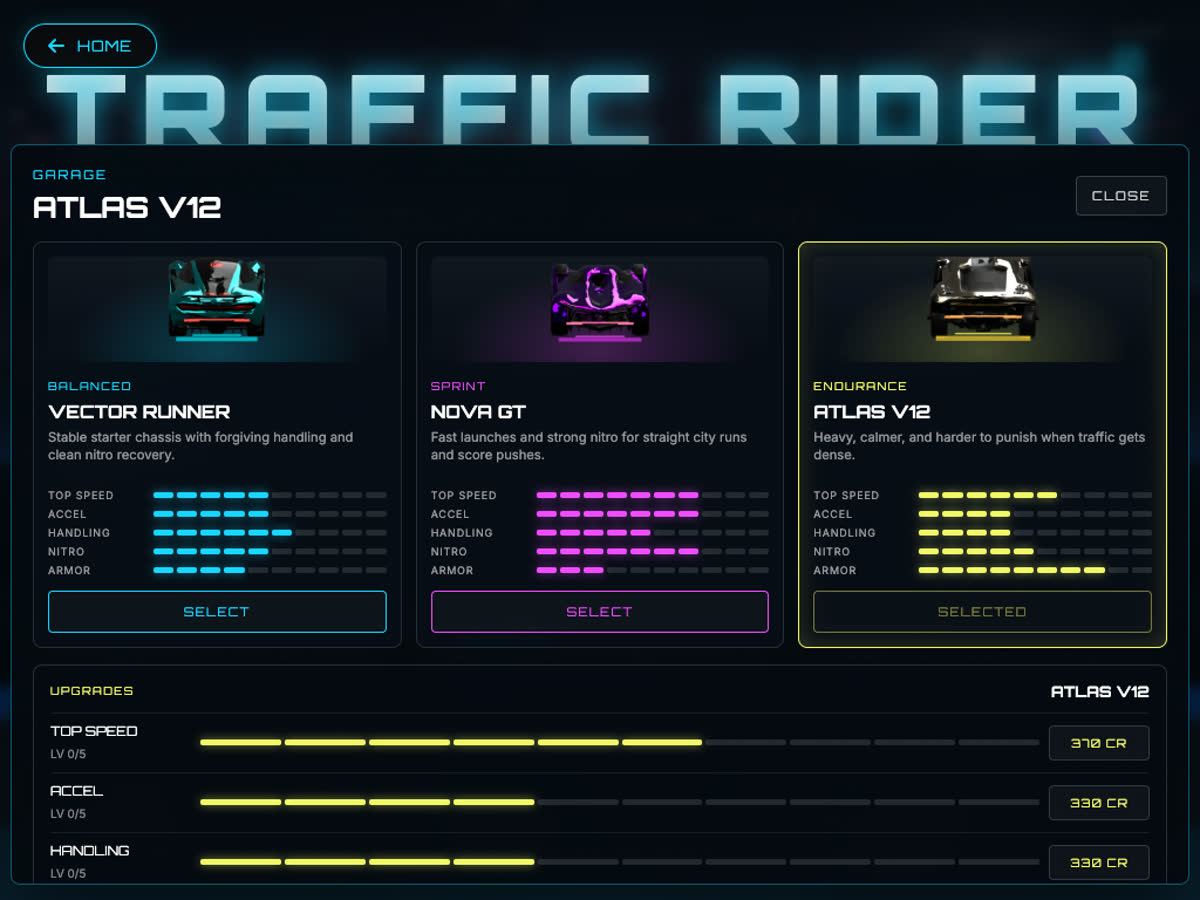
When I first added the garage to Traffic Rider Extreme, I was mostly thinking about gameplay. Vector Runner was supposed to be the balanced starter car. Nova GT would be the fast sprint car. Atlas V12 would be heavier, calmer, and harder to punish in dense traffic. On paper, that worked. In the game data, it also worked.
But once I saw the garage online, the problem was obvious. The three cars were still too close visually. They were not really three vehicles; they were one idea wearing three colors. That is a common early indie mistake: a feature is technically there, but the player cannot feel the difference immediately.
That was the point where I decided to bring Meshy and Blender into the pipeline. Not to turn the whole game into a 3D project. Traffic Rider Extreme is still a fast HTML5 canvas game, and I wanted to keep it that way. The goal was narrower: use 3D tools to make better source art, then ship simple images that the browser can draw quickly.
The Small Pipeline That Worked
I tried to keep the workflow boring on purpose. For a small web game, boring is good. It means I can repeat it next week when I need traffic cars, roadside props, or another garage upgrade.
Prompt a vehicle in Meshy
I wrote one prompt per vehicle. The important part was not “make it cool.” It was role and silhouette: balanced street racer, low sprint car, heavy endurance car. Since the game camera sits behind the car, the rear view mattered more than the front.
Refine and download the model
Meshy first creates a preview, then a refined textured model. I download the finished model into a local folder that Git ignores. That keeps the big source files on my machine instead of shipping them to every player.
Retexture when the surface is rough
This became the unexpected middle step. The first models had decent shapes, but the surfaces looked rough in-game. Retexture let me keep the shape and ask Meshy to repaint the car more like a clean arcade racer.
Render sprites in Blender
Finally, Blender turns the 3D model into a transparent PNG from the exact camera angle the game needs. The game never has to know there was a 3D model behind it.
Calling Meshy Safely
The first rule I set for myself was security-related, but it also made the pipeline cleaner: Meshy should never be called from the game itself. The game is public. The API key is private. Those two things should not meet.
So the key lives only in my local environment. Meshy is something I run while developing, the same way I might run an image export tool or an audio converter. Players never wait for it, and the deployed game never sees the key.
Local-only environment setupMESHY_API_KEY=your_key_here
I also wanted the commands to make paid steps feel deliberate. When you are experimenting with AI tools, it is easy to run one command too many. So safe commands, like listing presets and checking the balance, do not spend anything.
Safe checksnpm run meshy:list
npm run meshy:balance
Only the generation commands require a clear --yes. That tiny bit of friction is useful. It reminds me that this step can spend real credits.
Generate one vehicle modelnpm run meshy -- pipeline vector-runner-car --yes
The first pass uses Meshy's text-to-3D flow: create a geometry preview, refine it into a textured model, wait for completion, and download the result. It sounds like a lot, but once the helper script exists, the day-to-day workflow is just one command and a bit of waiting.
Why Retexture Was Needed
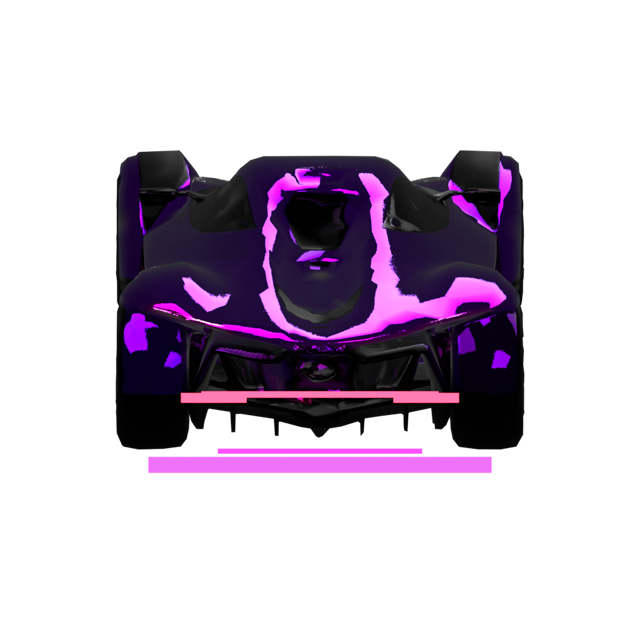
The first version was exciting for about five minutes. I had three real 3D cars. They were different. They loaded in the garage. They showed up in the race. Technically, it worked.
Then I looked at the car during actual gameplay and had the more honest reaction: it was ugly. The surface felt too raw, almost like a wet black clay model with random glossy patches. At full size it had detail, but at gameplay size that detail turned into noise.
My first instinct was to fix it in Blender by replacing the material myself. That made the cars cleaner, but it introduced another problem: they started to look like plastic toys. This was the useful lesson. The model shape was not the main issue anymore. The surface language was.
So I used Meshy Retexture. Instead of asking for new cars, I asked for cleaner racing materials on the same cars: teal metallic paint, smoked glass, rubber tires, crisp rear LEDs, magenta highlights, champagne armor panels. That gave me a much better starting point without throwing away the shapes I already liked.
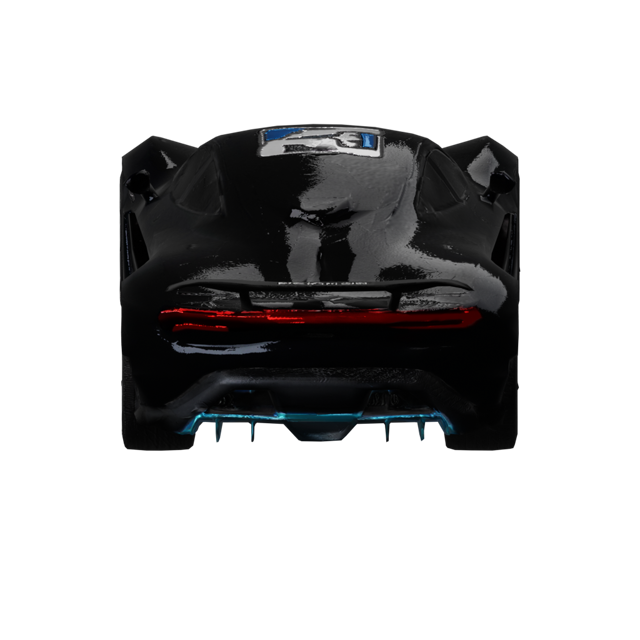
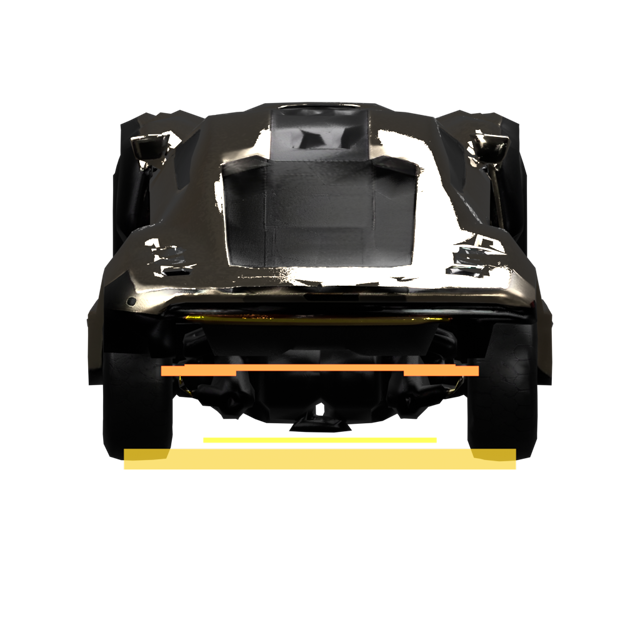
The first render had detail, but in motion the dark noisy material collapsed into a messy shape.
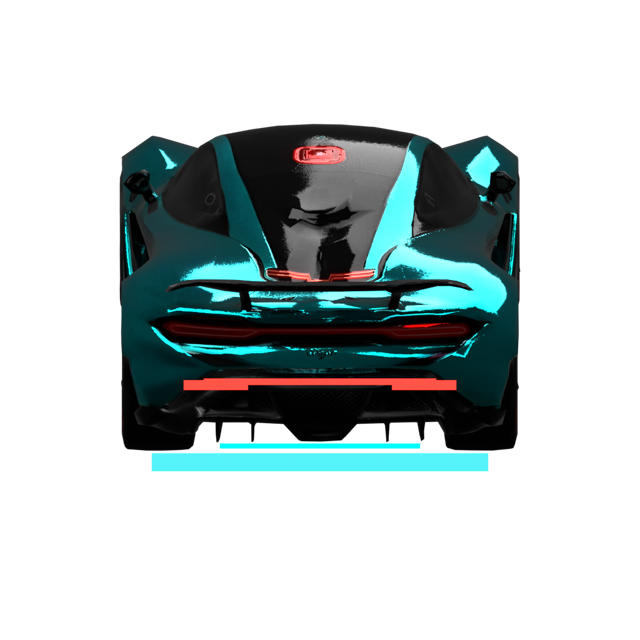
Retexture kept the silhouette and gave the car a clearer paint job, glass, tires, and lighting cues.
Retexture all garage vehiclesnpm run meshy -- retexture-vehicles --yes
What we learned
For small racing sprites, the model does not need perfect geometry. It needs a strong silhouette, readable lights, and clean contrast. A beautiful full-size 3D model can still fail when it becomes a 200-pixel gameplay car.
Using Blender as the Game Asset Optimizer
Blender became the quiet finishing tool in this process. I did not want to import 3D models into the browser renderer, because that would change the whole technical direction of the game. Traffic Rider Extreme already has a canvas road renderer that feels fast and stable. Replacing that with a heavier 3D scene just to show cars would be the wrong trade.
Instead, Blender sits before the game. It imports the Meshy model, lines it up, points a fixed camera at the rear, and renders a transparent image. The game receives a PNG and draws it like any other sprite.
The render script does four boring but important jobs every time:
- Import the downloaded model
- Normalize its size and center point
- Set a fixed rear camera and transparent background
- Export a square PNG the game can load instantly
Render the current Meshy models into game spritesnpm run meshy:render-vehicles
I also added simple rear light and underglow markers during the Blender render. They are not meant to fake the whole material. They are there for readability. In a racing game, the player is not calmly inspecting the car; they are watching the road, the traffic, the HUD, the speed, and the vehicle all at once.
Vector Runner
Balanced teal street racer with a clean rear light signature.
Nova GT
Low sprint car with violet paint and magenta racing highlights.
Atlas V12
Heavy endurance car with champagne armor panels and amber lighting.
Keeping the Browser Game Fast
This is the part I would repeat in future projects: use AI and 3D tools before the game loads, not while the player is waiting. The final online build does not load Meshy models. It does not call Meshy. It does not run Blender. It just loads normal images.
That gives the game the visual benefit of a 3D source asset without turning the runtime into a heavy 3D renderer. For a small browser game, that feels like the right balance.
This split is important for small web games:
- Private API keys stay private
- Players do not wait for generation tasks
- The game keeps simple image loading
- The source models can stay local and ignored by Git
Verification Before Shipping
The last step was not looking at the PNG files in isolation. That is useful, but it can be misleading. A car can look great on a black background and still fail once it is small, moving, and surrounded by neon lane lines.
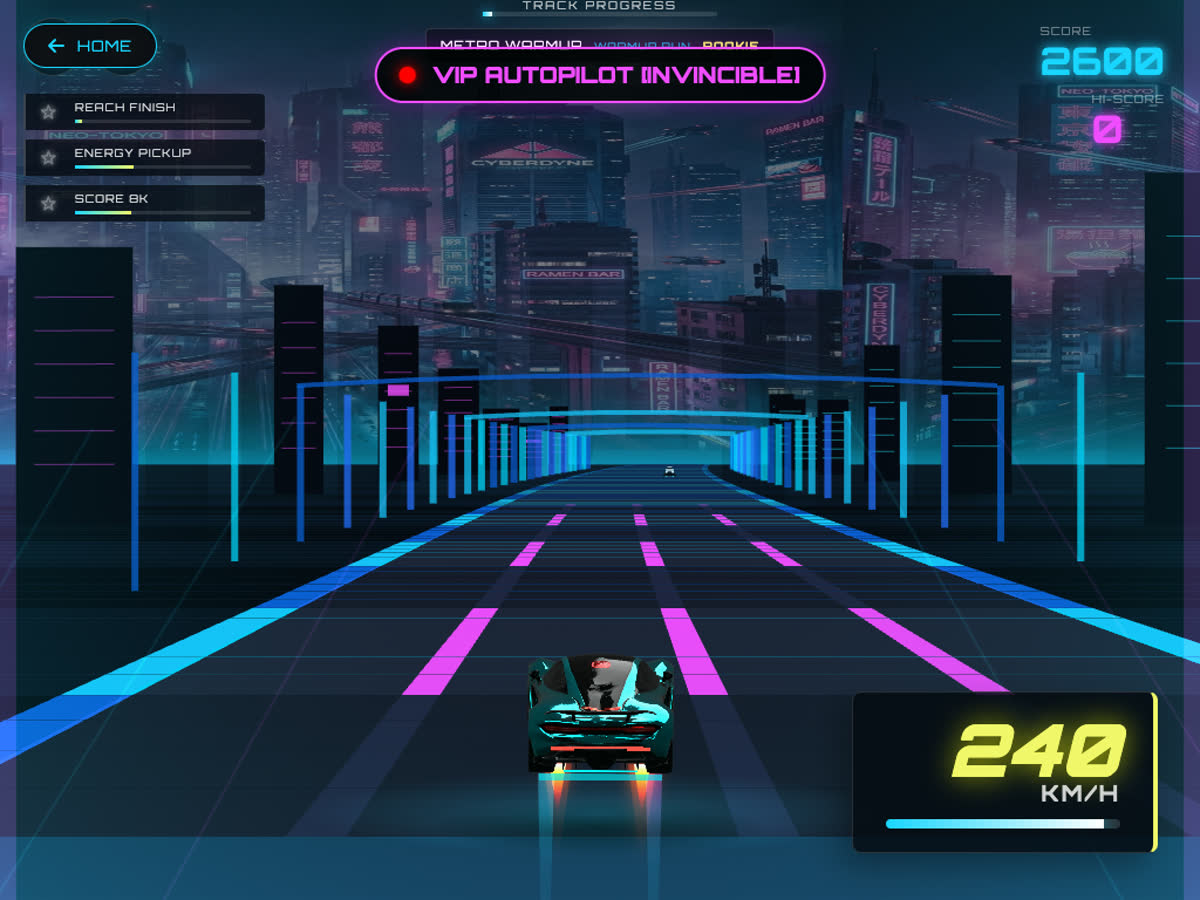
So I checked the garage first, then started a run with each vehicle. Vector, Nova, and Atlas all loaded correctly. Each one entered play mode. The browser console stayed clean. Most importantly, the cars finally read as three different vehicles while driving.
Final checks before pushingnpm run build
node scripts/test-migrated-games.js
The practical takeaway
Meshy is strongest when I use it as a fast 3D source generator. Blender is strongest when I use it as the repeatable finishing tool. The browser game should receive the simplest possible result: optimized images that already look right.